























Linea diretta di assistenza
Notizie

Notizie
Come calibrare correttamente gli analizzatori di rete e le misurazioni dei parametri S
2021-12-28
520
This article comes from the "Internet". If there is any infringement or other issues, please contact us to delete it.Sostenete la tutela dei diritti di proprietà intellettuale; vi preghiamo di indicare la fonte originale e l'autore in caso di riproduzione.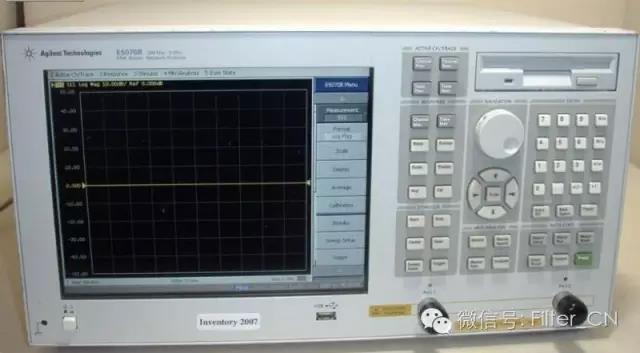
avviso speciale
Network sub-users, pleaseIndossa un braccialetto antistatico(chiunque, in qualsiasi momento)!!!
1. Collega la fonte di alimentazione (posiziona la fonte sul banco da lavoro). Devi abilitare4individuo"Linea/PotenzaPulsante ".
2. Collegare i connettori e i cavi aggiuntivi all'analizzatore di rete secondo necessità. Prestare molta attenzione durante la manipolazione dei cavi dell'analizzatore di rete e non piegarli eccessivamente.
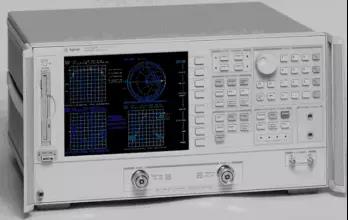
Calibrazione dell'analizzatore di rete (soloS11orS22reflection measurement).
a. Seleziona un kit di calibrazione in base al tipo di connettore che stai utilizzando.
b. Set frequency range. existSTIMOLOControlla la pressioneinizia a, enter the desired starting frequency. Repeat the same steps for the stop frequency.
c. Remove the calibration device to clear the table. Then press on the screen's soft key menuALTRO, Quindi premereeliminaCAL SET, and finally choose a number.
d. Select calibration type. usuallyCAL1-7mm, as this is the type of cable connected to the network analyzer.
e. scegliereS11-1porto oS22-1porta (a seconda del cavo che si desidera utilizzare).
f. You are prompted to place the calibration standard on the cable terminal. They are in wooden boxes.
f1. Start with the short circuit block (labeled). Connect the short circuit block and press the soft keyBREVE, while taking measurements (very quickly)BREVESottolineato. Rimuovere il blocco di cortocircuito, posizionare il coperchio di plastica sopra lo standard e individuare il blocco aperto.
f2. Blocco aperto. Ha la stessa lunghezza del blocco di cortocircuito, ma ha un diametro più piccolo e un foro all'estremità. secondoAPERTO,wait untilAPERTOUnderlined, remove the opener block and put the plastic cover in place.
f3. Find the load standard. This is the long, smooth cylinder in the box. Connect it and pressCARICARE,secondoBANDA LARGA, premi di nuovoCARICHI FATTISi presume che il nostro carico sia preciso sull'intero intervallo di frequenza di calibrazione, quindi questo è uno standard a banda larga. Richiudere il coperchio di plastica e riporre tutti gli standard nella scatola. (Attenzione! Questi standard sono piccoli e costosi e, se vengono smarriti, non avremo altri standard a disposizione.)
f4. Isolation measurements are omitted.
i. secondoSAVE CAL a 1 porta. Press a number, this is where you want to save the calibration settings. It should answer "Correzione attivata".
ii. Verificare la calibrazione. Lo scenario peggiore è solitamente un circuito aperto, quindi il criterio del circuito aperto viene reinserito.FORMATOPremere sul menuGRAFICO SMITH. dovrebbe essere infabbroYou see a small dot on the right side of the picture, but you may also see a short line. Check for short circuits and loads in the same way. For short circuit, should be infabbroYou can see a dot on the left side of the picture. For loads, the point should be in the middle. If none of these are "clear", redo these calibrations. Factors that may affect calibration include: the tightness of connections between cables and connectors, between components, and to the network analyzer.
iii. Se si ottengono buoni risultati di calibrazione, riporre la scatola standard nell'armadietto.
4b. Calibrate network analyzers (full two-port calibration for reflection and transmission measurements).
a. Seleziona un kit di calibrazione in base al tipo di connettore che stai utilizzando.
b. Set frequency range. existSTIMOLOControlla la pressioneinizia a, enter the desired starting frequency. Repeat the same steps for the stop frequency.
c. esistereMENUControlla la pressioneCAL.
d. Remove the calibration device to clear the table. Then press on the screen's soft key menuALTRO, Quindi premereeliminaCAL SET, and finally choose a number.
e. scegliereCAL 1 (7mm A.1), because you use7mmIl cavo di collegamento va all'analizzatore di rete.
f. scegliereRIFLETTETESoft keys (on the side of the screen).
g. press above4apartefCome accennato in precedenza, collegare circuito aperto, cortocircuito e coppia nell'ordine indicato.S11(porta1)eS22(porta2) calibrated terminals to match the load. When each terminal is attached to the cable, press its respective softkey, remove the terminal, and repeat the above steps until all calibrations are complete for both ports.
h. secondoRIFLETTI E FATTO.
i. scegliereTRASMISSIONESoft keys. Use threaded joints (with on both sides1/2Cavo di collegamento "filettatura lunga".1e cavi2. secondo4Per ciascuno dei tasti funzione, il tasto appare sottolineato. Premi di nuovoTRANSAZIONE FATTO.
j. secondoISOLAMENTOTasti funzione. ScegliOMETTI L'ISOLAMENTOSoft keys. according toISOLAMENTO FATTO.
k. This completes the calibration and the calibration results must be saved. chooseSALVA 2-PORTCAL. Salva i risultati della calibrazione in una posizione precedentemente eliminata (1-8(non importa quale usi, puoi usare diverse posizioni contemporaneamente per diversi test in diversi intervalli di frequenza). L'analizzatore di rete ora dovrebbe dire "CorrezioneON”.
l. Verificare la calibrazione. Lo scenario peggiore è solitamente un circuito aperto, quindi il criterio del circuito aperto viene reinserito.FORMATOPremere sul menuGRAFICO SMITH. dovrebbe essere infabbroYou see a small dot on the right side of the picture, but you may also see a short line. Check for short circuits and loads in the same way. For short circuit, should be infabbroYou can see a dot on the left side of the picture. For loads, the point should be in the middle. If none of these are "clear", redo these calibrations. Factors that may affect calibration include: the tightness of connections between cables and connectors, between components, and to the network analyzer.
m. Se si ottengono buoni risultati di calibrazione, riporre la scatola standard nell'armadietto.
4c. Calibrazione degli analizzatori di rete (per misurazioni su linee microstrip)TRL Two-port calibration)
see front4a(aesection) detailed introduction. Set frequency.
scegliereCAL.
deleteset cal.
scegliereCAL 1 (7mm A.1).
scegliereTLR Two port soft keys.
Collegare il vassoio per cavi microstrip alla porta1e porto2cavi collegati.
This calibration should use microstrip line calibrationTRLimpostare.
avràTHRUPosizionare il segmento di linea microstrip contrassegnato nella staffa di prova e regolare la staffa di prova in modo che sia posizionata correttamente a entrambe le estremità. È possibile guardare attraverso il foro nella parte superiore del supporto per assicurarsi che tutto sia posizionato correttamente. secondoTHRUPremere un tasto funzione e attendere che appaia un underscore indefinito.
Allentare la staffa di prova, nella porta della staffa di prova1conRIFLETTEREMarked shorter microstrip line (the other end of the microstrip line is not connected to the other side of the test bracket, thus enabling reflection calibration). according toS11 RIFLETTIe attendi che venga sottolineato. Posiziona il segmento di linea microstrip inS22side. according toS22 RIFLETTEREe attendere che venga sottolineato.
secondoISOLAMENTOSoft keys. according toOMETTI L'ISOLAMENTO , premi di nuovo ISOLAMENTO FATTO.
Posizionare un rack di prova conLINESegnare la lunga linea della microstriscia e premereLINEA/PARTITAtasto. Quando appare la sottolineatura, premereSALVA TRL 2-port key and save the calibration coefficients to the previously deleted location.
Enter microstrip line circuit testing as required.
relazionatoTRLNote importanti sulla calibrazione:
you will be inINGRESSOtable instead of where expectedIMPEDENZANella tabella sono riportati i dati a bassa frequenza. La frequenza di taglio del nostro sistema di calibrazione è approssimativamente2GHz.

Per misurare l'impedenza esistereFORMATOPremere sul menuSmith Chart. esistereMENUPremere sul menuMARCATORE>, utilizzare la manopola del pollice per spostare il marcatore sulla frequenza di interesse (indicata nell'angolo in alto a sinistra dello schermo).WThere are two numbers after , which are the impedance in Ω (real and imaginary parts). To use more markers, pressmarcatore, and select another number. There can be at most5marcatori (su frequenze diverse).
Per vedere il coefficiente di riflessione(S11orS22) esistereFORMATOPremere sul menuREGISTRO MAG. secondoMENU(existFORMATOmenu), che fornirà varie opzioni di stampa. Inizialmente visualizzato nell'angolo in alto a sinistra dello schermoREGISTRO MAGand its magnitude (annotated frequency with markers). Other options areLINMAG, SWR, VERO, IMMAGINE, POLARaspettare.
Per modificare la scala dell'immagine,esistereRISPOSTAPremere sul menuSCALE, ruotare la manopola di agopressione finché l'immagine non raggiunge la forma desiderata. Oppure selezionare Scala sul tastierino numerico (quindi premere sul tastierino numericox1).
Per ottenere una copia cartacea sul plotter:
1. Inserire la carta nel plotter (un foglio di carta, le impostazioni del plotter si fermano a2/3light gray). Press and hold the switch on the right. Turn on the plotter power (rear left).
2. esistereAUSILIARImenu (parte inferiore del pannello dell'analizzatore di rete) e premereCOPIA, send the drawing command to the plotter, specifying the content to be drawn (all)
Per salvare su disco:
1. Usa una Upiatto.
1. esistereAUSILIARIPremere sul menuDISCO.
2. ARCHIVIA.Altri. Dati - DATI.
3. questo farà emergereABCDEF... riga, come suggerimento per il nome del file. Usa il dito per ruotare la manopola sulla lettera e premiseleziona LETTERA, premi di nuovo Negozio. This will be saved in tab format. You can open this file with a simple text editor and load it intoMATLAB, and do other work.
This article comes from "Filter". If there is any infringement or other issues, please contact us to delete it.Sostenete la tutela dei diritti di proprietà intellettuale; vi preghiamo di indicare la fonte originale e l'autore in caso di riproduzione.
Raccomandazioni correlate