























الخط الساخن للخدمة
أخبار

أخبار
كيفية معايرة أجهزة تحليل الشبكة وقياسات معاملات S بشكل صحيح
2021-12-28
520
This article comes from the "Internet". If there is any infringement or other issues, please contact us to delete it.ادعموا حماية حقوق الملكية الفكرية، ويرجى ذكر المصدر الأصلي والمؤلف عند إعادة النشر.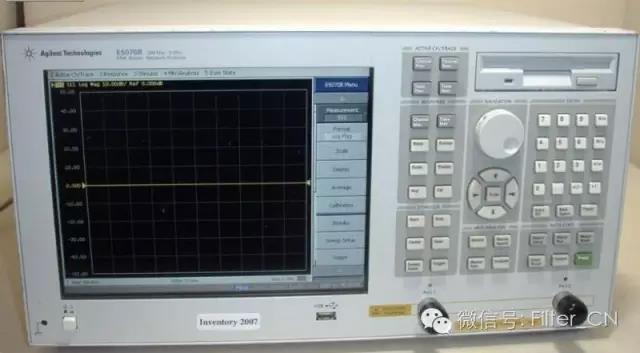
special warning
Network sub-users, pleaseWear an anti-static bracelet(anyone, anytime)! ! !
1. قم بتوصيل مصدر الطاقة (ضع المصدر على طاولة العمل). أنت بحاجة إلى التفعيل4indivual"الخط/الطاقة"زر.
2. Connect connectors and additional cables to the network analyzer as needed. Be very careful when handling network analyzer cables and do not bend them excessively.
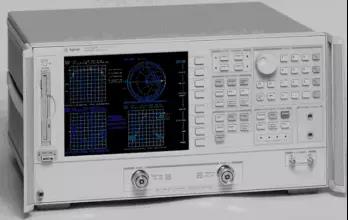
Calibrating the network analyzer (onlyS11orS22قياس الانعكاس).
a. Select a calibration kit based on the type of connector you are using.
b. Set frequency range. existالتحفيزالسيطرة على الصحافةبدايةأدخل تردد البدء المطلوب. كرر نفس الخطوات لتردد الإيقاف.
c. أزل جهاز المعايرة لتنظيف الطاولة. ثم اضغط على زر القائمة الموجود على الشاشة.أكثر، ثم اضغطحذف مجموعة CALوأخيراً، اختر رقماً.
d. Select calibration type. usuallyكال1-7 ملم, as this is the type of cable connected to the network analyzer.
e. اخترS11-1ميناء أوS22-1port (depending on the cable you want to use).
f. You are prompted to place the calibration standard on the cable terminal. They are in wooden boxes.
f1. Start with the short circuit block (labeled). Connect the short circuit block and press the soft keySHORTأثناء أخذ القياسات (بسرعة كبيرة)SHORTUnderlined. Remove the shorting block, place the plastic cover over the standard, and locate the open block.
f2. كتلة مفتوحة. طولها مماثل لطول كتلة التوصيل، لكن قطرها أصغر وبها ثقب في نهايتها. وفقًا لـفتح,wait untilفتحقم بإزالة كتلة الفتح وضع الغطاء البلاستيكي في مكانه.
f3. Find the load standard. This is the long, smooth cylinder in the box. Connect it and pressحمل،وفقموجة عريضة، اضغط مرة أخرىتم تنفيذ الأحمال. It is assumed that our load is accurate over the entire calibration frequency range, so this is a "broadband" standard. Replace the plastic cover and return all standards to the box. (Note! These standards are small and expensive, and if they are lost we will have no other standards.)
f4. تم حذف قياسات العزل.
i. بالنسبة الىSAVE1-port CAL. Press a number, this is where you want to save the calibration settings. It should answer "التصحيح قيد التشغيل".
ثانيًا. Check calibration. The worst case scenario is usually an open circuit, so the open circuit criterion is put in again. existFORMATاضغط على القائمةسميث الرسم البيانيينبغي أن يكون فيسميثسترى نقطة صغيرة على الجانب الأيمن من الصورة، ولكن قد ترى أيضًا خطًا قصيرًا. تحقق من وجود دوائر قصر وأحمال بنفس الطريقة. بالنسبة لدائرة القصر، يجب أن يكون فيسميثYou can see a dot on the left side of the picture. For loads, the point should be in the middle. If none of these are "clear", redo these calibrations. Factors that may affect calibration include: the tightness of connections between cables and connectors, between components, and to the network analyzer.
ثالثًا. إذا تم الحصول على نتائج معايرة جيدة، فأعد صندوق المعايرة القياسي إلى الخزانة.
4b. Calibrate network analyzers (full two-port calibration for reflection and transmission measurements).
a. Select a calibration kit based on the type of connector you are using.
b. Set frequency range. existالتحفيزالسيطرة على الصحافةبدايةأدخل تردد البدء المطلوب. كرر نفس الخطوات لتردد الإيقاف.
c. يوجدقائمة الطعامالسيطرة على الصحافةCAL.
d. أزل جهاز المعايرة لتنظيف الطاولة. ثم اضغط على زر القائمة الموجود على الشاشة.أكثر، ثم اضغطحذف مجموعة CALوأخيراً، اختر رقماً.
e. اختركال 1 (7 ملم أ.1)لأنك تستخدم7 ممThe connector cable goes to the network analyzer.
f. اخترريفليكت نالمفاتيح اللينة (على جانب الشاشة).
g. أو أعلى4aجزءfAs mentioned above, connect open circuit, short circuit and pair in order.S11(ميناء1) وS22(ميناء2قم بمعايرة الأطراف لتتوافق مع الحمل. عند توصيل كل طرف بالكابل، اضغط على المفتاح الخاص به، ثم افصل الطرف، وكرر الخطوات السابقة حتى تكتمل جميع المعايرات لكلا المنفذين.
h. بالنسبة الىتم الانعكاس.
i. اخترانتقالSoft keys. Use threaded joints (with on both sides1/2"خيط طويل) كابل توصيل1والكابلات2. وفق4For each of the soft keys, the key appears underlined. Press againتم التحويل.
j. بالنسبة الىعزلSoft keys. chooseحذف العزلةمفاتيح ناعمة. وفقًا لـتم العزل.
k. بهذا تكتمل عملية المعايرة، ويجب حفظ نتائجها. اخترحفظ 2-المدخلاحفظ نتائج المعايرة في موقع تم حذفه مسبقًا (1-8(لا يهم أي وضع تستخدمه، يمكنك استخدام عدة أوضاع في نفس الوقت لإجراء اختبارات مختلفة في نطاقات تردد مختلفة). يجب أن يقول محلل الشبكة الآن "تصحيح".
l. Check calibration. The worst case scenario is usually an open circuit, so the open circuit criterion is put in again. existFORMATاضغط على القائمةسميث الرسم البيانيينبغي أن يكون فيسميثسترى نقطة صغيرة على الجانب الأيمن من الصورة، ولكن قد ترى أيضًا خطًا قصيرًا. تحقق من وجود دوائر قصر وأحمال بنفس الطريقة. بالنسبة لدائرة القصر، يجب أن يكون فيسميثYou can see a dot on the left side of the picture. For loads, the point should be in the middle. If none of these are "clear", redo these calibrations. Factors that may affect calibration include: the tightness of connections between cables and connectors, between components, and to the network analyzer.
m. إذا تم الحصول على نتائج معايرة جيدة، فأعد صندوق المعايرة القياسي إلى الخزانة.
4c. معايرة أجهزة تحليل الشبكة (لقياسات خطوط الميكروستريب)TRL معايرة ثنائية المنافذ)
see front4a(أsection) detailed introduction. Set frequency.
اخترCAL.
حذفمجموعة كال.
اختركال 1 (7 ملم أ.1).
اخترTLR مفتاحان برمجيان للمنفذين.
Connect the microstrip cable tray to the port1والميناء2connected cables.
This calibration should use microstrip line calibrationTRLاقامة.
سوف يكونTHRUضع قطعة خط الميكروستريب المحددة في حامل الاختبار، واضبط الحامل بحيث يكون مثبتًا بشكل صحيح من كلا الطرفين. يمكنك النظر من خلال الفتحة الموجودة في أعلى الحامل للتأكد من وضع كل شيء بشكل صحيح.THRUاضغط على مفتاح التشغيل وانتظر حتى يظهر رمز الشرطة السفلية غير المحدد.
قم بفك دعامة الاختبار من منفذ دعامة الاختبار1معREFLECTMarked shorter microstrip line (the other end of the microstrip line is not connected to the other side of the test bracket, thus enabling reflection calibration). according toتعكس S11and wait for it to be underlined. Place the microstrip line segment intoS22side. according toيعكس S22وانتظر حتى يتم وضع خط تحته.
بالنسبة الىعزلمفاتيح ناعمة. وفقًا لـحذف العزلة ، اضغط مرة أخرى تم العزل.
ضع رف اختبار معخطضع علامة على خط microstrip الطويل واضغطالخط/المباراةالمفتاح. عندما يظهر الخط السفلي، اضغطحفظ TRL 2-port key and save the calibration coefficients to the previously deleted location.
Enter microstrip line circuit testing as required.
ذات صلةTRLImportant notes on calibration:
ستكون فيالقبولالجدول بدلاً من المكان المتوقعمعاوقةتظهر بيانات التردد المنخفض في الجدول. يبلغ تردد القطع لإعداد المعايرة لدينا تقريبًا2GHz.

لقياس المعاوقة يوجدFORMATاضغط على القائمةسميث الرسم البياني. يخرجالقائمةاضغط على القائمةعلامة>استخدم زر الإبهام لتحريك المؤشر إلى التردد الذي ترغب فيه (الموضح في الزاوية العلوية اليسرى من الشاشة). موجودWThere are two numbers after , which are the impedance in Ω (real and imaginary parts). To use more markers, pressعلامةثم اختر رقمًا آخر. يمكن أن يكون هناك على الأكثر5علامات (على ترددات مختلفة).
لمعرفة معامل الانعكاس(S11orS22) يوجدFORMATاضغط على القائمةسجل ماج. وفقالقائمة(existFORMATالقائمة)، والتي ستوفر خيارات طباعة متنوعة. تظهر في البداية في الزاوية العلوية اليسرى من الشاشةسجل ماجand its magnitude (annotated frequency with markers). Other options areلين ماج، SWR، ريال، ايماج، POLARانتظر.
لتغيير حجم الصورة،يخرجRESPONSEاضغط على القائمةمقياسأدر مقبض الضغط حتى تصل الصورة إلى الشكل المطلوب. أو حدد "مقياس" على لوحة المفاتيح الرقمية (ثم اضغط على لوحة المفاتيح الرقمية).x1).
للحصول على نسخة ورقية على الراسمة:
1. ضع الورقة في الراسمة (ورقة واحدة، تتوقف إعدادات الراسمة عند2/3(لون رمادي فاتح). اضغط مع الاستمرار على المفتاح الموجود على اليمين. شغّل طاقة الراسمة (الخلفي الأيسر).
2. يوجدمساعدmenu (lower part of the network analyzer panel) and pressCOPY, send the drawing command to the plotter, specifying the content to be drawn (all)
للحفظ على القرص:
1. استخدم Uطبق.
1. يوجدمساعداضغط على القائمةأسطوانة.
2. STORE.More. البيانات - البيانات.
3. سيؤدي هذا إلى ظهورABCDEF... سطر، كتلميح لاسم الملف. استخدم إصبعك لتدوير المقبض إلى الحرف واضغطاختر الحرف، اضغط مرة أخرى المتجر. This will be saved in tab format. You can open this file with a simple text editor and load it intoماتلاب, and do other work.
هذا المقال منشور في موقع "فلتر". في حال وجود أي انتهاك أو مشاكل أخرى، يرجى التواصل معنا لحذفه.ادعموا حماية حقوق الملكية الفكرية، ويرجى ذكر المصدر الأصلي والمؤلف عند إعادة النشر.
توصيات ذات صلة
Kinghelm نائب مدير المبيعات بينغ هويشنغ: من عرقية الهاكا في شنتشن، متمسكاً بطموحه الأصلي من خلال العمل الجاد
2026-08-03
1285
سونغ شي تشيانغ يتحدث عن الاستراتيجية: أبرز أحداث حوارات شنغهاي الإلكترونية لعام 2026
2026-07-21
1342
شغف جامعة تسينغهوا: التغلب على التحديات في علوم المواد - مقابلة مع سين جيان جون من شركة CEN Ningbo Jinshan New Materials Company
2026-07-14
1315