























Talian Hotline Perkhidmatan
Berita

Berita
Cara menentukur penganalisis rangkaian dan ukuran parameter-S dengan betul
2021-12-28
520
This article comes from the "Internet". If there is any infringement or other issues, please contact us to delete it.Sokong perlindungan hak harta intelek, sila nyatakan sumber asal dan pengarang semasa mencetak semula.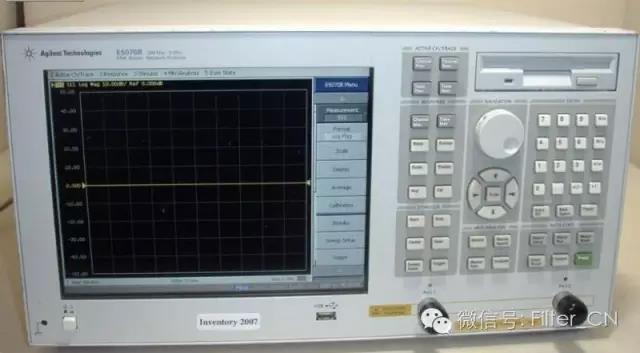
amaran khas
Sub-pengguna rangkaian, silaPakai gelang anti-statik(anyone, anytime)! ! !
1. Sambungkan sumber kuasa (letakkan sumber di atas meja kerja). anda perlu mendayakannya4individu"Talian/Kuasa"butang.
2. Sambungkan penyambung dan kabel tambahan ke penganalisis rangkaian mengikut keperluan. Berhati-hati semasa mengendalikan kabel penganalisis rangkaian dan jangan bengkokkannya secara berlebihan.
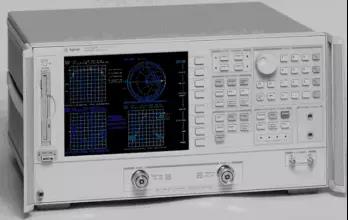
Calibrating the network analyzer (onlyS11orS22reflection measurement).
a. Select a calibration kit based on the type of connector you are using.
b. Tetapkan julat frekuensi. wujudRANGSANGANKawal tekan ataspermulaan, masukkan frekuensi permulaan yang diingini. Ulangi langkah yang sama untuk frekuensi henti.
c. Tanggalkan peranti penentukuran untuk mengosongkan jadual. Kemudian tekan pada menu kekunci lembut skrinMORE, Kemudian tekandeleteCAL SET, and finally choose a number.
d. Select calibration type. usuallyCAL1-7mm, as this is the type of cable connected to the network analyzer.
e. memilihS11-1pelabuhan atauS22-1port (bergantung pada kabel yang anda ingin gunakan).
f. You are prompted to place the calibration standard on the cable terminal. They are in wooden boxes.
f1. Start with the short circuit block (labeled). Connect the short circuit block and press the soft keyPENDEK, while taking measurements (very quickly)PENDEKBergaris bawah. Tanggalkan blok pintasan, letakkan penutup plastik di atas standard dan cari blok terbuka.
f2. Open block. It is the same length as the shorting block, but has a smaller diameter and a hole at the end. according toBUKA,wait untilBUKAUnderlined, remove the opener block and put the plastic cover in place.
f3. Find the load standard. This is the long, smooth cylinder in the box. Connect it and pressLOAD, menurutJALAN LEBAR, press againSELESAI MUAT. It is assumed that our load is accurate over the entire calibration frequency range, so this is a "broadband" standard. Replace the plastic cover and return all standards to the box. (Note! These standards are small and expensive, and if they are lost we will have no other standards.)
f4. Isolation measurements are omitted.
i. mengikutSAVE1-port CAL. Press a number, this is where you want to save the calibration settings. It should answer "Pembetulan HIDUP".
ii. Check calibration. The worst case scenario is usually an open circuit, so the open circuit criterion is put in again. existFORMATPress on the menuCARTA SMITHsepatutnya berada dalamsmithYou see a small dot on the right side of the picture, but you may also see a short line. Check for short circuits and loads in the same way. For short circuit, should be insmithYou can see a dot on the left side of the picture. For loads, the point should be in the middle. If none of these are "clear", redo these calibrations. Factors that may affect calibration include: the tightness of connections between cables and connectors, between components, and to the network analyzer.
iii. If good calibration results are obtained, return the standard box to the cabinet.
4b. Calibrate network analyzers (full two-port calibration for reflection and transmission measurements).
a. Select a calibration kit based on the type of connector you are using.
b. Tetapkan julat frekuensi. wujudRANGSANGANKawal tekan ataspermulaan, masukkan frekuensi permulaan yang diingini. Ulangi langkah yang sama untuk frekuensi henti.
c. wujudLELAKIKawal tekan atasCAL.
d. Tanggalkan peranti penentukuran untuk mengosongkan jadual. Kemudian tekan pada menu kekunci lembut skrinMORE, Kemudian tekandeleteCAL SET, and finally choose a number.
e. memilihCAL 1 (7 mm A.1), because you use7mmThe connector cable goes to the network analyzer.
f. memilihREFLECT'NKekunci lembut (di sisi skrin).
g. tekan di atas4asebahagianfAs mentioned above, connect open circuit, short circuit and pair in order.S11(Pelabuhan1)danS22(Pelabuhan2) calibrated terminals to match the load. When each terminal is attached to the cable, press its respective softkey, remove the terminal, and repeat the above steps until all calibrations are complete for both ports.
h. mengikutREFLECT'N DONE.
i. memilihPENGHANTARANKekunci lembut. Gunakan sambungan berulir (dengan kedua-dua belah1/2Kabel penyambung "Benang panjang"1dan kabel2. mengikut4For each of the soft keys, the key appears underlined. Press againTRANS.SELESAI.
j. mengikutPENGASINGANSoft keys. chooseTINGGALKAN PENGASINGANSoft keys. according toPENGASINGAN SELESAI.
k. This completes the calibration and the calibration results must be saved. chooseJIMAT 2-PORTCALSimpan keputusan penentukuran ke lokasi yang telah dipadamkan sebelum ini (1-8) (tidak kira yang mana satu yang anda gunakan, anda boleh menggunakan beberapa kedudukan pada masa yang sama untuk ujian yang berbeza dalam julat frekuensi yang berbeza). Penganalisis rangkaian kini sepatutnya mengatakan "PembetulanHIDUP”.
l. Check calibration. The worst case scenario is usually an open circuit, so the open circuit criterion is put in again. existFORMATPress on the menuCARTA SMITHsepatutnya berada dalamsmithYou see a small dot on the right side of the picture, but you may also see a short line. Check for short circuits and loads in the same way. For short circuit, should be insmithYou can see a dot on the left side of the picture. For loads, the point should be in the middle. If none of these are "clear", redo these calibrations. Factors that may affect calibration include: the tightness of connections between cables and connectors, between components, and to the network analyzer.
m. If good calibration results are obtained, return the standard box to the cabinet.
4c. Calibrating network analyzers (for microstrip line measurements)TRL Two-port calibration)
see front4a(aesection) detailed introduction. Set frequency.
memilihCAL.
memadamset cal.
memilihCAL 1 (7 mm A.1).
memilihTLR Two port soft keys.
Connect the microstrip cable tray to the port1dan pelabuhan2connected cables.
Penentukuran ini harus menggunakan penentukuran garisan mikrojalurTRLsediakan.
akan mempunyaiTHRUPlace the marked microstrip line segment into the test bracket and adjust the test bracket so that it is properly placed at both ends. You can look through the hole in the top of the stand to make sure everything is placed correctly. according toTHRUsoftkey and wait until undefined underscore appears.
Loosen the test bracket, at the test bracket's port1bersamaREFLECTMarked shorter microstrip line (the other end of the microstrip line is not connected to the other side of the test bracket, thus enabling reflection calibration). according toS11 REFLEKSIdan tunggu sehingga ia digariskan. Letakkan segmen garisan mikrojalur ke dalamS22side. according toS22 REFLEKSIdan tunggu sehingga ia digariskan.
mengikutPENGASINGANSoft keys. according toTINGGALKAN PENGASINGAN , press again PENGASINGAN SELESAI.
Place a test rack withLINEMark the long microstrip line and pressBARISAN/PERLAWANANkekunci. Apabila garis bawah muncul, tekanJIMAT TRL 2-port key and save the calibration coefficients to the previously deleted location.
Masukkan ujian litar talian mikrojalur seperti yang diperlukan.
berkaitanTRLImportant notes on calibration:
you will be inKEMASUKANtable instead of where expectedIMPEDANData frekuensi rendah dilihat dalam jadual. Kekerapan pemotongan persediaan penentukuran kami adalah lebih kurang2GHz.

To measure impedance wujudFORMATPress on the menuSmith Carta. wujudMENUPress on the menuPENANDA>, use the thumb knob to move the marker to the frequency you are interested in (indicated in the upper left corner of the screen). existWThere are two numbers after , which are the impedance in Ω (real and imaginary parts). To use more markers, presspenanda, dan pilih nombor lain. Paling banyak boleh ada5penanda (pada frekuensi yang berbeza).
To see the reflection coefficient(S11orS22) wujudFORMATPress on the menuLOG MAG. mengikutMENU(wujudFORMATmenu), which will provide various options for printing. Initially displayed in the upper left corner of the screenLOG MAGdan magnitudnya (frekuensi beranotasi dengan penanda). Pilihan lain ialahLIN MAG, SWR, REAL, GAMBAR, POLARtunggu.
Untuk menukar skala imej, wujudTANGGUNGJAWABPress on the menuSKALA, turn the acupressure knob until the image reaches the shape you want. Or select Scale on the Numeric keypad (then press on the Numeric keypadx1).
Untuk mendapatkan salinan cetak pada plotter:
1. Letakkan kertas ke dalam plotter (satu keping kertas, tetapan plotter berhenti pada2/3(kelabu muda). Tekan dan tahan suis di sebelah kanan. Hidupkan kuasa plotter (kiri belakang).
2. wujudAUXILLARYmenu (lower part of the network analyzer panel) and pressSALINAN, hantar arahan lukisan kepada plotter, menyatakan kandungan yang hendak dilukis (semua)
To save to disk:
1. Use a Upinggan.
1. wujudAUXILLARYPress on the menuCAKERA.
2. KEDAI.Lagi. Data - DATA.
3. ini akan mengeluarkanA B C D E F... line, as a hint for the file name. Use your finger to turn the knob to the letter and presspilih HURUF, press again Kedai. This will be saved in tab format. You can open this file with a simple text editor and load it intomatlab, dan melakukan kerja-kerja lain.
This article comes from "Filter". If there is any infringement or other issues, please contact us to delete it.Sokong perlindungan hak harta intelek, sila nyatakan sumber asal dan pengarang semasa mencetak semula.
Cadangan Berkaitan