























Service Hotline
חדשות

חדשות
כיצד לכייל נכון מנתחי רשת ומדידות פרמטר S
2021-12-28
520
This article comes from the "Internet". If there is any infringement or other issues, please contact us to delete it.לתמוך בהגנה על זכויות קניין רוחני, אנא ציין את המקור המקורי ואת המחבר בעת הדפסה חוזרת.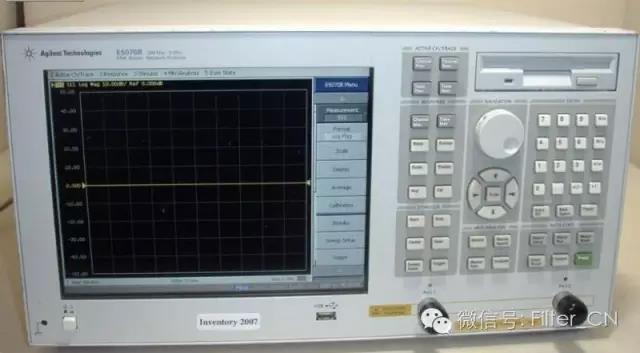
special warning
Network sub-users, pleaseWear an anti-static bracelet(כל אחד, בכל עת)!!!
1. חבר את מקור הכוח (הנח את המקור על שולחן העבודה). עליך להפעיל4אינדיבידואלקו/כוח"כפתור.
2. חבר מחברים וכבלים נוספים למנתח הרשת לפי הצורך. יש לנקוט משנה זהירות בעת טיפול בכבלים של מנתח הרשת ואל תכופף אותם יתר על המידה.
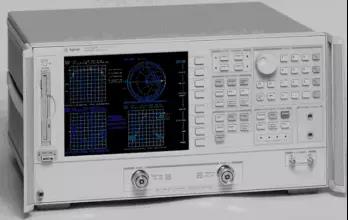
Calibrating the network analyzer (onlyS11orS22מדידת השתקפות).
a. בחר ערכת כיול בהתבסס על סוג המחבר בו אתה משתמש.
b. Set frequency range. existגירוילחץ למעלההתחלה, הזן את תדר ההתחלה הרצוי. חזור על אותם שלבים עבור תדר העצירה.
c. Remove the calibration device to clear the table. Then press on the screen's soft key menuנוסף, ולאחר מכן לחץ עלמחיקת הגדרת CAL, and finally choose a number.
d. בחר סוג כיול. בדרך כללCAL1-7 מ"מ, מכיוון שזהו סוג הכבל המחובר למנתח הרשת.
e. לבחורS11-1נמל אוS22-1יציאה (בהתאם לכבל שברצונך להשתמש בו).
f. You are prompted to place the calibration standard on the cable terminal. They are in wooden boxes.
f1. התחל עם בלוק הקצר (מסומן). חבר את בלוק הקצר ולחץ על מקש הבחירהקצר, תוך כדי ביצוע מדידות (מהר מאוד)קצרUnderlined. Remove the shorting block, place the plastic cover over the standard, and locate the open block.
f2. בלוק פתוח. הוא באותו אורך כמו בלוק המקצר, אך בעל קוטר קטן יותר וחור בקצה. לפילִפְתוֹחַ,wait untilלִפְתוֹחַבקו תחתון, הסר את בלוק הפותח והתקן את מכסה הפלסטיק במקומו.
f3. Find the load standard. This is the long, smooth cylinder in the box. Connect it and pressלִטעוֹן,לְפִיפס רחב, לחץ שובבוצע המוןההנחה היא שהעומס שלנו מדויק על פני כל טווח תדרי הכיול, כך שזהו תקן "פס רחב". יש להחזיר את מכסה הפלסטיק ולהחזיר את כל הסטנדרטים לקופסה. (שימו לב! תקנים אלה קטנים ויקרים, ואם יאבדו לא יהיו לנו תקנים אחרים.)
f4. מדידות בידוד הושמטו.
i. על פיSAVE1-port CALלחץ על מספר, כאן ברצונך לשמור את הגדרות הכיול. התשובה אמורה להיות "תיקון מופעל".
ii. Check calibration. The worst case scenario is usually an open circuit, so the open circuit criterion is put in again. existפורמטלחץ על התפריטתרשים סמיט. should be inנפחYou see a small dot on the right side of the picture, but you may also see a short line. Check for short circuits and loads in the same way. For short circuit, should be inנפחYou can see a dot on the left side of the picture. For loads, the point should be in the middle. If none of these are "clear", redo these calibrations. Factors that may affect calibration include: the tightness of connections between cables and connectors, between components, and to the network analyzer.
ג. If good calibration results are obtained, return the standard box to the cabinet.
4b. Calibrate network analyzers (full two-port calibration for reflection and transmission measurements).
a. בחר ערכת כיול בהתבסס על סוג המחבר בו אתה משתמש.
b. Set frequency range. existגירוילחץ למעלההתחלה, הזן את תדר ההתחלה הרצוי. חזור על אותם שלבים עבור תדר העצירה.
c. להתקייםתפריטיםלחץ למעלהCAL.
d. Remove the calibration device to clear the table. Then press on the screen's soft key menuנוסף, ולאחר מכן לחץ עלמחיקת הגדרת CAL, and finally choose a number.
e. לבחורCAL 1 (7 מ"מ A.1), כי אתה משתמש7mmThe connector cable goes to the network analyzer.
f. לבחורREFLECT'Nמקשים רכים (בצד המסך).
g. לחץ למעלה4aחלקfAs mentioned above, connect open circuit, short circuit and pair in order.S11(נמל1)וS22(נמל2) הדקים מכוילים כדי להתאים לעומס. כאשר כל הדקה מחוברת לכבל, לחץ על מקש הבחירה המתאים לו, הסר את ההדק וחזור על השלבים לעיל עד שכל הכיולים יושלמו עבור שני היציאות.
h. על פיREFLECT'N DONE.
i. לבחורתיבת הילוכיםמקשי רכות. השתמשו במפרקים הברגה (עם משני הצדדים1/2"חוט ארוך) כבל חיבור1וכבלים2. לפי4For each of the soft keys, the key appears underlined. Press againהעברה בוצעה.
j. על פיבידודSoft keys. chooseהשמיט את הבידודמקשי רכות. בהתאםהבידוד נעשה.
k. פעולה זו משלימה את הכיול ויש לשמור את תוצאות הכיול. בחרשמור 2-PORTCALשמור את תוצאות הכיול במיקום שנמחק בעבר (1-8) (it doesn’t matter which one you use, you can use several positions at the same time for different tests in different frequency ranges). The network analyzer should now say "CorrectionON".
l. Check calibration. The worst case scenario is usually an open circuit, so the open circuit criterion is put in again. existפורמטלחץ על התפריטתרשים סמיט. should be inנפחYou see a small dot on the right side of the picture, but you may also see a short line. Check for short circuits and loads in the same way. For short circuit, should be inנפחYou can see a dot on the left side of the picture. For loads, the point should be in the middle. If none of these are "clear", redo these calibrations. Factors that may affect calibration include: the tightness of connections between cables and connectors, between components, and to the network analyzer.
m. If good calibration results are obtained, return the standard box to the cabinet.
4c. Calibrating network analyzers (for microstrip line measurements)TRL כיול דו-יציאות)
see front4a(aesection) detailed introduction. Set frequency.
לבחורCAL.
להסירcal set.
לבחורCAL 1 (7 מ"מ A.1).
לבחורLRT Two port soft keys.
חבר את מגש כבל המיקרוסטריפ לפורט1ונמל2כבלים מחוברים.
This calibration should use microstrip line calibrationTRLלהכין.
יהיה לידרךPlace the marked microstrip line segment into the test bracket and adjust the test bracket so that it is properly placed at both ends. You can look through the hole in the top of the stand to make sure everything is placed correctly. according toדרךבחר את מקש הבחירה והמתן עד להופעת קו תחתון לא מוגדר.
שחררו את תושבת הבדיקה, בפתח של תושבת הבדיקה1עםמשקףMarked shorter microstrip line (the other end of the microstrip line is not connected to the other side of the test bracket, thus enabling reflection calibration). according toS11 REFLECTוהמתן עד שזה יהיה תחתון. מקם את קטע הקו של המיקרוסטריפ בתוךS22side. according toS22 REFLECTולחכות שזה יהיה תחתון.
על פיבידודמקשי רכות. בהתאםהשמיט את הבידוד , לחץ שוב הבידוד נעשה.
הנח מתקן בדיקה עםקוסמן את קו המיקרו-סטריפ הארוך ולחץLINE/MATCHkey. When the underline appears, pressשמור TRL מפתח 2-פורטים ושמור את מקדמי הכיול במיקום שנמחק קודם לכן.
Enter microstrip line circuit testing as required.
קָשׁוּרTRLImportant notes on calibration:
you will be inקבלהטבלה במקום היכן שציפועכבהנתוני תדר נמוך נראים בטבלה. תדר החיתוך של מערך הכיול שלנו הוא בערך2GHz.

כדי למדוד עכבה להתקייםפורמטלחץ על התפריטתרשים סמיתקייםMENUלחץ על התפריטMARKER>, השתמש בכפתור האגודל כדי להזיז את הסמן לתדר שמעניין אותך (מסומן בפינה השמאלית העליונה של המסך). קייםWישנם שני מספרים אחרי , שהם העכבה ב-Ω (חלק ממשי ומדומה). כדי להשתמש בסמנים נוספים, לחץ עלסמן, ובחר מספר אחר. יכול להיות לכל היותר5markers (on different frequencies).
לראות את מקדם ההשתקפות(S11orS22) להתקייםפורמטלחץ על התפריטLOG MAG. לפיMENU(לְהִתְקַיֵםפורמטmenu), which will provide various options for printing. Initially displayed in the upper left corner of the screenLOG MAGand its magnitude (annotated frequency with markers). Other options areLIN MAG, SWR, נדל"ן, IMAG, פולארלַחֲכוֹת.
כדי לשנות את קנה המידה של התמונה,לְהִתְקַיֵםתגובהלחץ על התפריטקנה מידה, turn the acupressure knob until the image reaches the shape you want. Or select Scale on the Numeric keypad (then press on the Numeric keypadx1).
כדי לקבל עותק מודפס על הקושר:
1. הנח את הנייר בפלוטר (פיסת נייר אחת, הגדרות הפלוטר נעצרות ב...)2/3(אפור בהיר). לחץ והחזק את המתג מימין. הפעל את המתח של הפלוטר (אחורי שמאל).
2. להתקייםעזרmenu (lower part of the network analyzer panel) and pressCOPY, שלח את פקודת הציור לפלוטר, תוך ציון התוכן שיש לצייר (הכל)
כדי לשמור בדיסק:
1. השתמש ב-Uצלחת.
1. להתקייםעזרלחץ על התפריטדיסק.
2. חנות.עוד. נתונים - נתונים.
3. this will bring outABCDEF... שורה, כרמז לשם הקובץ. השתמש באצבעך כדי לסובב את הכפתור לאות וללחוץבחר אות, לחץ שוב חנות. This will be saved in tab format. You can open this file with a simple text editor and load it intoמטלב, ולעשות עבודות אחרות.
מאמר זה מגיע מ"Filter". אם יש הפרה כלשהי או בעיות אחרות, אנא צרו איתנו קשר כדי למחוק אותו.לתמוך בהגנה על זכויות קניין רוחני, אנא ציין את המקור המקורי ואת המחבר בעת הדפסה חוזרת.
Related Recommendations
Kinghelm סגן מנהל המכירות פנג הויסנג: האקה בשנג'ן, נשאר נאמן לשאיפתו המקורית באמצעות עבודה קשה
2026-08-03
1285
התשוקה של אוניברסיטת Tsinghua: התגברות על אתגרים במדעי החומר - ראיון עם Cen Jianjun מ-CEN Ningbo Jinshan New Materials Company
2026-07-14
1315