























Línea Directa de Servicio
Noticias

Noticias
Cómo calibrar correctamente los analizadores de red y las mediciones de parámetros S.
2021-12-28
520
Este artículo proviene de Internet. Si existe alguna infracción de derechos de autor u otro problema, por favor, contáctenos para que lo eliminemos.Apoye la protección de los derechos de propiedad intelectual; por favor, indique la fuente original y el autor al reproducir este material.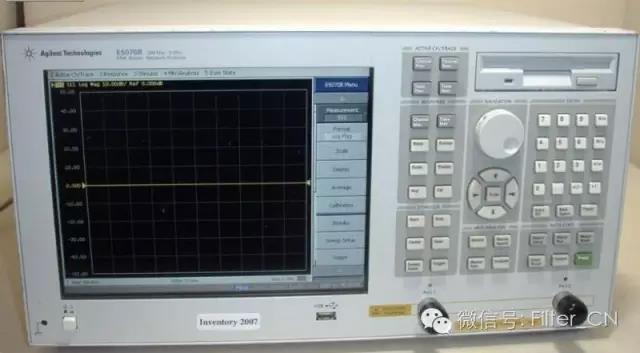
special warning
Subusuarios de la red, por favorWear an anti-static bracelet(¡cualquiera, en cualquier momento!)
1. Connect the power source (place the source on the workbench). you need to enable4indivual"Línea/alimentación.
2. Connect connectors and additional cables to the network analyzer as needed. Be very careful when handling network analyzer cables and do not bend them excessively.
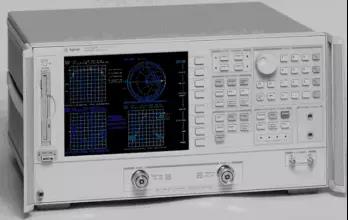
Calibrating the network analyzer (onlyS11orS22medición de la reflexión).
a. Select a calibration kit based on the type of connector you are using.
b. Set frequency range. existESTÍMULOPulsar arribacomienzo, enter the desired starting frequency. Repeat the same steps for the stop frequency.
c. Remove the calibration device to clear the table. Then press on the screen's soft key menuMÁS, entonces presioneeliminarCAL SET, and finally choose a number.
d. Select calibration type. usuallyCAL1-7mm, as this is the type of cable connected to the network analyzer.
e. chooseS11-1puerto oS22-1port (depending on the cable you want to use).
f. You are prompted to place the calibration standard on the cable terminal. They are in wooden boxes.
f1. Start with the short circuit block (labeled). Connect the short circuit block and press the soft keySHORT, while taking measurements (very quickly)SHORTSubrayado. Retire el bloque de cortocircuito, coloque la cubierta de plástico sobre el estándar y localice el bloque abierto.
f2. Open block. It is the same length as the shorting block, but has a smaller diameter and a hole at the end. according toABIERTO,wait untilABIERTOUnderlined, remove the opener block and put the plastic cover in place.
f3. Find the load standard. This is the long, smooth cylinder in the box. Connect it and pressCARGA,de acuerdo aBANDA ANCHA, presione de nuevoCARGAS HECHASSe asume que nuestra carga es precisa en todo el rango de frecuencia de calibración, por lo que se trata de un estándar de banda ancha. Vuelva a colocar la cubierta de plástico y guarde todos los estándares en la caja. (¡Nota! Estos estándares son pequeños y costosos, y si se pierden, no tendremos otros).
f4. Isolation measurements are omitted.
i. según los estándaresGUARDAR CAL de 1 puerto. Press a number, this is where you want to save the calibration settings. It should answer "Corrección activada".
ii. Compruebe la calibración. El peor escenario suele ser un circuito abierto, por lo que se vuelve a incluir el criterio de circuito abierto.FORMATOPulsa en el menúGRÁFICO DE SMITH. should be inherreroVerás un pequeño punto en el lado derecho de la imagen, pero también podrías ver una línea corta. Comprueba si hay cortocircuitos y cargas de la misma manera. Para un cortocircuito, debería estar enherreroYou can see a dot on the left side of the picture. For loads, the point should be in the middle. If none of these are "clear", redo these calibrations. Factors that may affect calibration include: the tightness of connections between cables and connectors, between components, and to the network analyzer.
iii. If good calibration results are obtained, return the standard box to the cabinet.
4b. Calibrate network analyzers (full two-port calibration for reflection and transmission measurements).
a. Select a calibration kit based on the type of connector you are using.
b. Set frequency range. existESTÍMULOPulsar arribacomienzo, enter the desired starting frequency. Repeat the same steps for the stop frequency.
c. existeMENÚSPulsar arribaCAL.
d. Remove the calibration device to clear the table. Then press on the screen's soft key menuMÁS, entonces presioneeliminarCAL SET, and finally choose a number.
e. chooseCAL 1 (7 mm A.1)porque usas7 mmThe connector cable goes to the network analyzer.
f. chooseREFLEXIONARSoft keys (on the side of the screen).
g. press above4apartefComo se mencionó anteriormente, conecte el circuito abierto, el cortocircuito y el par en ese orden.S11(Puerto1)yS22(Puerto2) calibrated terminals to match the load. When each terminal is attached to the cable, press its respective softkey, remove the terminal, and repeat the above steps until all calibrations are complete for both ports.
h. según los estándaresREFLEXIONAR Y HECHO.
i. chooseTRANSMISIÓNESSoft keys. Use threaded joints (with on both sides1/2"Rosca larga) cable de conexión1y cables2. de acuerdo a4For each of the soft keys, the key appears underlined. Press againTRANS.HECHO.
j. según los estándaresAISLAMIENTOTeclas programables. elegirOMITIR AISLAMIENTOSoft keys. according toAISLAMIENTO REALIZADO.
k. Esto completa la calibración y los resultados de la calibración deben guardarse.AHORRE 2-PORTCAL. Save calibration results to a previously deleted location (1-8) (no importa cuál uses, puedes usar varias posiciones al mismo tiempo para diferentes pruebas en diferentes rangos de frecuencia). El analizador de red ahora debería decir "Corrección ON”.
l. Compruebe la calibración. El peor escenario suele ser un circuito abierto, por lo que se vuelve a incluir el criterio de circuito abierto.FORMATOPulsa en el menúGRÁFICO DE SMITH. should be inherreroVerás un pequeño punto en el lado derecho de la imagen, pero también podrías ver una línea corta. Comprueba si hay cortocircuitos y cargas de la misma manera. Para un cortocircuito, debería estar enherreroYou can see a dot on the left side of the picture. For loads, the point should be in the middle. If none of these are "clear", redo these calibrations. Factors that may affect calibration include: the tightness of connections between cables and connectors, between components, and to the network analyzer.
m. If good calibration results are obtained, return the standard box to the cabinet.
4c. Calibración de analizadores de red (para mediciones en líneas microstrip)TRL Two-port calibration)
see front4a(aesection) detailed introduction. Set frequency.
chooseCAL.
eliminarconjunto de calibración.
chooseCAL 1 (7 mm A.1).
chooseTLR Two port soft keys.
Conecte la bandeja de cables microstrip al puerto.1y puerto2connected cables.
This calibration should use microstrip line calibrationTRLpreparar.
tendráA TRAVÉSPlace the marked microstrip line segment into the test bracket and adjust the test bracket so that it is properly placed at both ends. You can look through the hole in the top of the stand to make sure everything is placed correctly. according toA TRAVÉSsoftkey and wait until undefined underscore appears.
Loosen the test bracket, at the test bracket's port1 con REFLEXIONARMarked shorter microstrip line (the other end of the microstrip line is not connected to the other side of the test bracket, thus enabling reflection calibration). according toT11 REFLEXIONARy espere a que se subraye. Coloque el segmento de línea de microcinta enS22side. according toS22 REFLEXIONARy esperar a que se subraye.
según los estándaresAISLAMIENTOSoft keys. according toOMITIR AISLAMIENTO , presione de nuevo AISLAMIENTO REALIZADO.
Place a test rack withLÍNEAMarque la línea larga de microstrip y presioneLÍNEA/COINCIDENCIAkey. When the underline appears, pressGUARDAR TRL Clave de 2 puertos y guarde los coeficientes de calibración en la ubicación previamente eliminada.
Enter microstrip line circuit testing as required.
relacionadoTRLNotas importantes sobre la calibración:
estarás enENTRADAmesa en lugar de donde se esperabaIMPEDANCIALow frequency data are seen in the table. The cutoff frequency of our calibration setup is approximately2GHz.

Para medir la impedancia existeFORMATOPulsa en el menúSmith Gráfico. existirMENÚPulsa en el menúMARCADOR>Utilice el mando giratorio para mover el marcador a la frecuencia que le interese (indicada en la esquina superior izquierda de la pantalla).WThere are two numbers after , which are the impedance in Ω (real and imaginary parts). To use more markers, pressmarcador, and select another number. There can be at most5marcadores (en diferentes frecuencias).
Para ver el coeficiente de reflexión.(S11orS22) existeFORMATOPulsa en el menúREGISTRO MAG. de acuerdo aMENÚ(existFORMATOmenu), which will provide various options for printing. Initially displayed in the upper left corner of the screenREGISTRO MAGand its magnitude (annotated frequency with markers). Other options areLIN MAG, SWR, REAL, IMAGEN, POLARespera.
Para cambiar la escala de la imagen,existirRESPUESTAPulsa en el menúESCALA, gire la perilla de acupresión hasta que la imagen alcance la forma que desea. O seleccione Escala en el teclado numérico (luego presione en el teclado numérico).x1).
Para obtener una copia impresa en el trazador:
1. Place the paper into the plotter (one piece of paper, the plotter settings stop at2/3light gray). Press and hold the switch on the right. Turn on the plotter power (rear left).
2. existeAUXILIARmenu (lower part of the network analyzer panel) and pressCOPIA, send the drawing command to the plotter, specifying the content to be drawn (all)
Para guardar en el disco:
1. Usa una Uplato.
1. existeAUXILIARPulsa en el menúDISCO.
2. TIENDA.Más. Datos - DATOS.
3. this will bring outA B C D E F... line, as a hint for the file name. Use your finger to turn the knob to the letter and pressseleccionar LETRA, presione de nuevo Tienda. Esto se guardará en formato de tabulación. Puede abrir este archivo con un editor de texto simple y cargarlo enmatlab, and do other work.
This article comes from "Filter". If there is any infringement or other issues, please contact us to delete it.Apoye la protección de los derechos de propiedad intelectual; por favor, indique la fuente original y el autor al reproducir este material.
Recomendaciones relacionadas