























Hotline Layanan
Berita

Berita
Cara mengkalibrasi penganalisis jaringan dan pengukuran parameter S dengan benar.
2021-12-28
520
This article comes from the "Internet". If there is any infringement or other issues, please contact us to delete it.Dukung perlindungan hak kekayaan intelektual, mohon sebutkan sumber dan penulis asli saat mencetak ulang.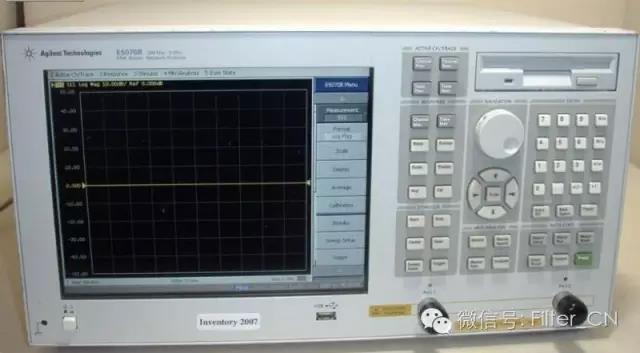
peringatan khusus
Pengguna sub-jaringan, silakanWear an anti-static bracelet(anyone, anytime)! ! !
1. Connect the power source (place the source on the workbench). you need to enable4indivual"Saluran/Kekuatan"Tombol.
2. Hubungkan konektor dan kabel tambahan ke penganalisis jaringan sesuai kebutuhan. Berhati-hatilah saat menangani kabel penganalisis jaringan dan jangan menekuknya secara berlebihan.
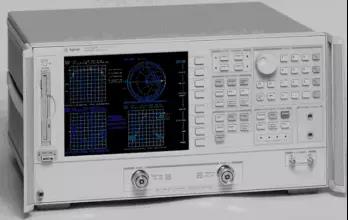
Kalibrasi penganalisis jaringan (hanyaS11orS22pengukuran refleksi).
a. Pilih kit kalibrasi berdasarkan jenis konektor yang Anda gunakan.
b. Tetapkan rentang frekuensi. adaRANGSANGANKontrol tekan ke atasawal, enter the desired starting frequency. Repeat the same steps for the stop frequency.
c. Remove the calibration device to clear the table. Then press on the screen's soft key menuLEBIH, Lalu tekanhapus SET CAL, and finally choose a number.
d. Pilih jenis kalibrasi. biasanyaCAL1-7mm, as this is the type of cable connected to the network analyzer.
e. pilihS11-1pelabuhan atauS22-1port (tergantung pada kabel yang ingin Anda gunakan).
f. You are prompted to place the calibration standard on the cable terminal. They are in wooden boxes.
f1. Mulailah dengan blok hubung singkat (berlabel). Hubungkan blok hubung singkat dan tekan tombol lunak.PENDEK, while taking measurements (very quickly)PENDEKUnderlined. Remove the shorting block, place the plastic cover over the standard, and locate the open block.
f2. Blok terbuka. Panjangnya sama dengan blok pendek, tetapi memiliki diameter yang lebih kecil dan lubang di ujungnya. menurutOPEN,wait untilOPENUnderlined, remove the opener block and put the plastic cover in place.
f3. Find the load standard. This is the long, smooth cylinder in the box. Connect it and pressLOAD,menurutLUAS, tekan lagiSELESAI BEBANDiasumsikan bahwa beban kita akurat di seluruh rentang frekuensi kalibrasi, jadi ini adalah standar "pita lebar". Pasang kembali penutup plastik dan kembalikan semua standar ke dalam kotak. (Catatan! Standar ini kecil dan mahal, dan jika hilang kita tidak akan memiliki standar lain.)
f4. Isolation measurements are omitted.
i. MenurutSIMPAN 1-port CALTekan sebuah angka, di sinilah Anda ingin menyimpan pengaturan kalibrasi. Seharusnya akan muncul jawaban "Koreksi AKTIF".
ii. Periksa kalibrasi. Skenario terburuk biasanya adalah rangkaian terbuka, jadi kriteria rangkaian terbuka diterapkan kembali. adaFORMATTekan menuBAGAN SMITH. seharusnya ada dismithYou see a small dot on the right side of the picture, but you may also see a short line. Check for short circuits and loads in the same way. For short circuit, should be insmithYou can see a dot on the left side of the picture. For loads, the point should be in the middle. If none of these are "clear", redo these calibrations. Factors that may affect calibration include: the tightness of connections between cables and connectors, between components, and to the network analyzer.
iii. Jika hasil kalibrasi yang baik diperoleh, kembalikan kotak standar ke dalam kabinet.
4b. Calibrate network analyzers (full two-port calibration for reflection and transmission measurements).
a. Pilih kit kalibrasi berdasarkan jenis konektor yang Anda gunakan.
b. Tetapkan rentang frekuensi. adaRANGSANGANKontrol tekan ke atasawal, enter the desired starting frequency. Repeat the same steps for the stop frequency.
c. adaMENUKontrol tekan ke atasCAL.
d. Remove the calibration device to clear the table. Then press on the screen's soft key menuLEBIH, Lalu tekanhapus SET CAL, and finally choose a number.
e. pilihCAL 1 (7 mm A.1), because you use7mmKabel konektor terhubung ke penganalisis jaringan.
f. pilihRENUNGKANTombol lunak (di sisi layar).
g. tekan di atas4abagianfAs mentioned above, connect open circuit, short circuit and pair in order.S11(Pelabuhan1)danS22(Pelabuhan2) terminal yang telah dikalibrasi agar sesuai dengan beban. Setelah setiap terminal terpasang pada kabel, tekan tombol lunak yang sesuai, lepaskan terminal, dan ulangi langkah-langkah di atas hingga semua kalibrasi selesai untuk kedua port.
h. MenurutRENUNGKAN SELESAI.
i. pilihTRANSMISIKunci lunak. Gunakan sambungan berulir (dengan di kedua sisi)1/2"Long thread) connecting cable1dan kabel2. berdasarkan4Untuk setiap tombol lunak, tombol tersebut akan digarisbawahi. Tekan lagi.TRANS.SELESAI.
j. MenurutISOLASITombol lunak. pilihHILANGKAN ISOLASISoft keys. according toISOLASI SELESAI.
k. This completes the calibration and the calibration results must be saved. chooseSIMPAN 2-PORTKAL. Save calibration results to a previously deleted location (1-8(Tidak masalah mana yang Anda gunakan, Anda dapat menggunakan beberapa posisi secara bersamaan untuk pengujian berbeda dalam rentang frekuensi yang berbeda). Penganalisis jaringan sekarang seharusnya mengatakan "KoreksiON”.
l. Periksa kalibrasi. Skenario terburuk biasanya adalah rangkaian terbuka, jadi kriteria rangkaian terbuka diterapkan kembali. adaFORMATTekan menuBAGAN SMITH. seharusnya ada dismithYou see a small dot on the right side of the picture, but you may also see a short line. Check for short circuits and loads in the same way. For short circuit, should be insmithYou can see a dot on the left side of the picture. For loads, the point should be in the middle. If none of these are "clear", redo these calibrations. Factors that may affect calibration include: the tightness of connections between cables and connectors, between components, and to the network analyzer.
m. Jika hasil kalibrasi yang baik diperoleh, kembalikan kotak standar ke dalam kabinet.
4c. Calibrating network analyzers (for microstrip line measurements)TRL Kalibrasi dua port)
lihat depan4a(aebagian) pengantar terperinci. Atur frekuensi.
pilihCAL.
hapusset kal.
pilihCAL 1 (7 mm A.1).
pilihTLR Dua tombol lunak port.
Connect the microstrip cable tray to the port1dan pelabuhan2connected cables.
This calibration should use microstrip line calibrationTRLmempersiapkan.
akan memilikiMELALUITempatkan segmen garis mikrostrip yang telah ditandai ke dalam braket uji dan sesuaikan braket uji agar terpasang dengan benar di kedua ujungnya. Anda dapat melihat melalui lubang di bagian atas dudukan untuk memastikan semuanya terpasang dengan benar.MELALUIsoftkey and wait until undefined underscore appears.
Loosen the test bracket, at the test bracket's port1denganMENCERMINKANMarked shorter microstrip line (the other end of the microstrip line is not connected to the other side of the test bracket, thus enabling reflection calibration). according toS11 REFLEKSIand wait for it to be underlined. Place the microstrip line segment intoS22sisi. menurutS22 RENUNGKANdan tunggu sampai digarisbawahi.
MenurutISOLASISoft keys. according toHILANGKAN ISOLASI , tekan lagi ISOLASI SELESAI.
Letakkan rak uji denganGARISTandai jalur microstrip yang panjang dan tekanGARIS/PERTANDINGANkey. When the underline appears, pressSIMPAN TRL 2-port key and save the calibration coefficients to the previously deleted location.
Enter microstrip line circuit testing as required.
terkaitTRLImportant notes on calibration:
Anda akan berada diPENERIMAANtabel, bukan di tempat yang diharapkan.IMPEDANSIData frekuensi rendah terlihat pada tabel. Frekuensi cutoff dari pengaturan kalibrasi kami kira-kira2GHz.

To measure impedance adaFORMATTekan menuSmith Chart. adaMENUTekan menuPENANDA>, use the thumb knob to move the marker to the frequency you are interested in (indicated in the upper left corner of the screen). existWThere are two numbers after , which are the impedance in Ω (real and imaginary parts). To use more markers, presspenanda, and select another number. There can be at most5penanda (pada frekuensi yang berbeda).
To see the reflection coefficient(S11orS22) adaFORMATTekan menuLOG MAG. berdasarkanMENU(existFORMATmenu), which will provide various options for printing. Initially displayed in the upper left corner of the screenLOG MAGand its magnitude (annotated frequency with markers). Other options areLIN MAG, SWR, NYATA, GAMBAR, POLARmenunggu.
To change the image scale,adaTANGGAPANTekan menuSKALA, turn the acupressure knob until the image reaches the shape you want. Or select Scale on the Numeric keypad (then press on the Numeric keypadx1)。
Untuk mendapatkan salinan cetak pada plotter:
1. Place the paper into the plotter (one piece of paper, the plotter settings stop at2/3abu-abu muda). Tekan dan tahan sakelar di sebelah kanan. Hidupkan daya plotter (belakang kiri).
2. adaTAMBAHANmenu (bagian bawah panel penganalisis jaringan) dan tekanCOPY, kirim perintah menggambar ke plotter, dengan menentukan konten yang akan digambar (semua)
To save to disk:
1. Gunakan huruf Upiring.
1. adaTAMBAHANTekan menuCAKRAM.
2. TOKO.Selengkapnya. Data - DATA.
3. ini akan memunculkanABCDEF... baris, sebagai petunjuk untuk nama file. Gunakan jari Anda untuk memutar kenop ke huruf tersebut dan tekanpilih HURUF, tekan lagi TokoIni akan disimpan dalam format tab. Anda dapat membuka file ini dengan editor teks sederhana dan memuatnya ke dalammatlab, and do other work.
This article comes from "Filter". If there is any infringement or other issues, please contact us to delete it.Dukung perlindungan hak kekayaan intelektual, mohon sebutkan sumber dan penulis asli saat mencetak ulang.
Rekomendasi Terkait